Modular Lithium Battery – Introduction, Assembling and Connection
APR 23, 2020 Pageview:1187
Lithium batteries have transformed the revolution of technology by providing a sufficient energy source accompanied by a stable power supply. The need for more power increased, and this has led to the invention of the modular lithium battery systems.
What is a modular lithium battery?
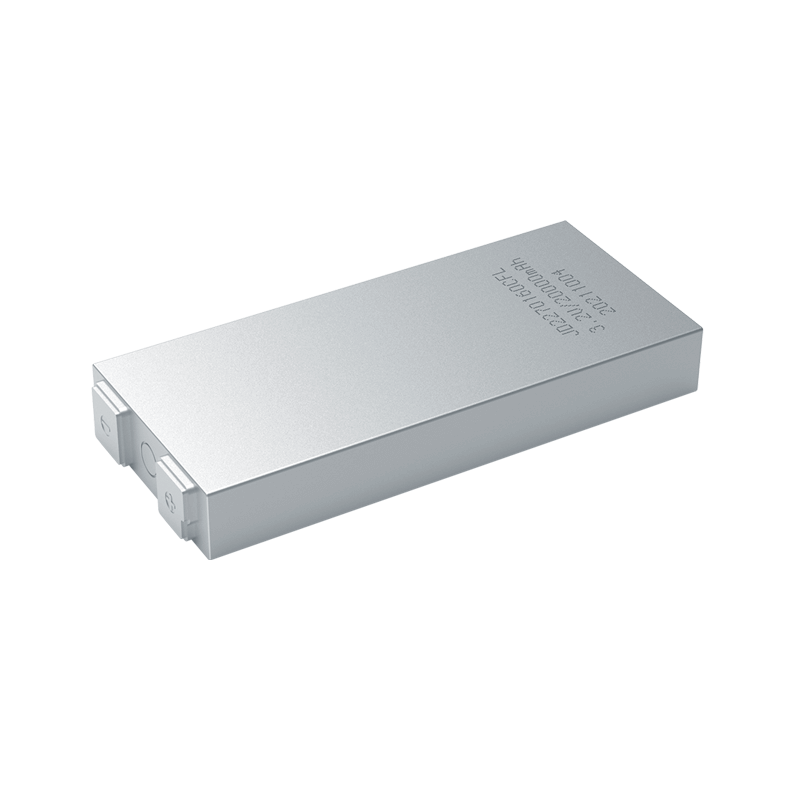
A modular lithium battery is a modular battery system that includes lithium cells as the primary battery type. These are battery systems used to high-end power applications that require large amounts of energy.
How do you assemble a modular lithium battery?
Step 1: The ingredients/tools
Ingredients
You will need to acquire the following parts from your home or their relevant retail stores.
2.Battery Management System (BMS)
3.Nickel strips
4.Battery Level Indicator
5.Screws (about 3M x 10mm)
6.18650 battery holder
7.DC Jack
8.Rocker Switch
Tools
You will also need a few tools for experimenting carefully.
1.Hot Air Blower
2.Lithium-ion charger
3.Multimeter
4.Wirecutter
5.Spot welder
For safety precautions, it is advisable to wear safety goggles and electrical gloves because you will be handling electrical equipment.
Step 2: Choosing the best 18650 cells for the pack
There are many 18650 cells available in the market with a wide range of prices. However, choosing the best 18650 batteries can prove to be difficult and especially for such a sensitive project. You are. Therefore, it advised buying 18650 cells from reputable and branded sources such as Samsung, LG, Panasonic, Sanyo, or others. The reason behind this is because their cells contain well-documented performance properties as well as efficient quality control. Try not to go for these cheap batteries because most of them tend to be factory rejects and can be hazardous.
Step 3: Picking out the battery strips
This may seem like an optional concern, but in reality, one has to consider how they would connect their 18650 cells effectively. Using Nickel strips or thick wire is one of the most suitable methods of joining the cells together. When you go shopping for strips, you would find nickel-steel strips in abundance and can be tempting to purchase. However, it is recommended that you use pure Nickel strips because they have a much lower resistance than the steel-plated ones.
Step 4: Spot Welding
Normally, there are usually two options for connecting the 18650 cells, and they include soldering and spot welding. The most efficient and recommended choice would be to go for spot welding over soldering. However, spot welders tend to be more costly as compared to a suitable soldering iron. The reason why spot welding is recommended over soldering is that it securely and firmly joins the cells without adding excessive heat. You can get yourself a hobby-grade spot welder, which costs about ten times less than a professional-grade one.
Step 5: Confirm the cell voltage
Before you attempt to connect the cells in parallel, you should check the cell voltage for each cell. Since you’ll be connecting the cells in a parallel circuit, you will need to ensure that the voltage for each cell is either close or similar. This is because if the cells had a significant voltage difference when the circuit is closed, large amounts of current would flow from the high-voltage cells to the low ones. As this happens, there will be a lot of pressure put on the low-voltage cells and could eventually damage the cells. Use the multimeter to confirm the voltage of each cell.
It is recommended that you use brand new cells because they stand a lesser chance of having large voltage differences. A normal 18650 cell can measure between 3.5V and 3.7V. This is the safest voltage range for batteries included in this experiment.
Step 6: Capacity and voltage of the pack
For you to construct the battery pack, you will need to finalize on its nominal voltage and capacity. To confirm the desired capacity (mAh), you will have to arrange the cells in a parallel connection. On the other hand, for the nominal voltage V, the cells should be arranged in series. Say, for example, you were aiming at a total capacity of around 17000mAh or 17Ah. Using 18650 cells, each measuring 3.7V and a capacity of 3400mAh, you would need a total of 5 cells.
On the other hand, when it comes to the voltage of the cells, you will need to determine the total voltage of the pack you require. For example, if you’re aiming for a total voltage of about 11.1 V for the pack, using 3.7V cells, you would need about three 18650 single cells for each series connection.
Step 7: Assembling the cells
Using the data from step 6, you would confirm that your battery pack will be made up of 3 parallel groups that are connected in series. Also, each of these groups would have five cells making a total of 15 cells. You will then have to arrange all the 15 cells appropriately for installing the best electrical connection together with the BMS.
You can place the first group of cells with the positive terminal facing the roof and the second group with the negative terminal facing up. In the third group, the positive terminal should again be facing up. You can then assemble the cells to make the pack using 18650 cell holders. It is advisable to use cell holders instead of glue for holding the cells in place because they provide space in between them. This allows fresh air to flow in between and, therefore, cool the batteries. Also, it serves as an anti-vibration safety precaution for your pack.
Step 8: Spot weld the strips
Before you start welding, you will need to prepare the Nickel strips and the welder too. Lay the strips on top of the five cells in parallel, ensuring that they cover all terminals. Leave about 10mm of space for connecting to the BMS. You may need about four long strips for the parallel connection and ten strips for the series one.
You will then have to adjust the welder pulse and the current knob per the thickness of the Nickel strips. Gently and carefully weld the strips onto the cells until they are firmly in place.
Step 9: Installing the BMS
A BMS is made up of four soldering pads, and they include B-, B1, B2, and B+. You are required to connect the first parallel group’s negative terminals to the B- pad and their positive terminals to the B+ one. For the third parallel-group, you will have to connect their negative terminal bus to the B2 pad and the positive terminal bus to the B+ pad. You can spot weld the nickel strips to the BMS.
Step 10: Printing the enclosure
The battery pack is nearly complete but is exposed all around. To avoid any shorting, you can use the 3D printer to print an enclosure with the perfect measurements.
Step 11: Connecting the wires
A typical battery has two terminals for connecting the load and charge the battery as well. You can add the battery level indicator to check on the battery level when you need to. Use the DC Jack for input/output and the Rocker switch to turn on or off the battery level indicator. You can even use a shrink tube to insulate the various conductive parts of the pack. You have to install the components of the pack into the enclosure before spot welding the wires to the BMS.
Step 12: Final touches
You can apply hot glue at the base of the battery compartment and screw the top lids in place. You can now charge the battery using a suitable adapter before using it.
Can you connect modular lithium batteries?
It is possible to connect modular lithium batteries to get a more powerful energy source capable of providing significant energy sources for high-end machines. However, you can only connect them if they are of the same lithium battery type and contain the same specification features.
Final words
For your e-bike or another high-end machine, you will need an excellent modular battery system such as lithium to provide sufficient energy.
- Prev Article: Best Lithium Polymer Battery- Brand, Advantages, and Usage
- Next Article: Where can you buy 3-volt lithium batteries?
Leave Message
Hottest Categories
-
Hottest Industry News
-
Latest Industry News


