What Size Heat Shrink for 18650 Battery? – Size and Method
APR 17, 2020 Pageview:8571
What size shrink wrap do you need?
Determining the size of heat shrink you need is an easy activity. The first thing to do would be to be familiar with the different sizes of heat shrinks. Heat shrinks designed for wires are typically measured by their diameter. However, the large ones designated for battery pack and other large items, are usually measured by the flattened width because they come flattened on a roll thus, making the measurement simpler.
You would first need to calculate the perimeter of the battery by adding the height and width of your cell. You would then multiply the results by 2. The size of the heat shrink will thus, be determined between the two results. Many a time, heat shrinks are typically measured in metric sizes. This means that if you wee to calculate the size in inches, you will have to convert them to millimeters.
How do you shrink wrap an 18650 battery?
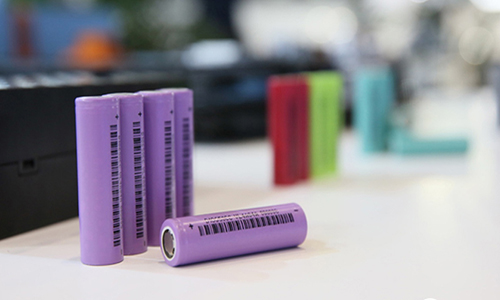
The entire body of an 18650 battery is usually a negative terminal and therefore, using it without any wrap can be extremely dangerous. There are risks of short-circuiting within the cells and this can cause spontaneous combustion forcing the battery to explode. If you happen to extract any battery from your device, you would always notice that each individual cell has been wrapped in a somewhat nylon material. Most of the time, these wraps have been glued onto the battery’s surface and if you try forcing it off, you may end up damaging the entire wrap.
Step 1. Materials
You will need to acquire the following materials to begin the experiment:
Heat gun/ hair dryer. Other opinions may recommend lighters at times, but this would be dangerous due to wild flames. It is thus advisable to stick to heat guns or hair driers.
Knife and ruler
18650 battery
Wrap
Ruler/ calipers. Try to avoid metal calipers as these can short the batteries and halt the process.
Step 2. Cutting the wrap
Normally a wrap is designed to be 30mm wide with the inner diameter customized to be a few mm wider than the battery itself. Try to cut the wraps a bit longer on either side by about 3mm to get a total of around 72mm a piece. This is because 18650 batteries are usually about 70 mm thus you need extra wrap to cover the entire body and overlap by a few mm.
You can use a ruler to measure the 72 mm and the knife it out. Be careful when cutting using a knife because you might harm yourself or damage the wrap forcing you to cut out another one.
Step 3. Wrapping the battery
Using the cut wrap, envelope the entire body of the battery and ensure it is aligned.
Step 4. Shrink heat the wrap
Gently apply heat on the wrap from the top to the bottom while rotating it. Apply heat for only a few seconds because too much of it can melt the wrap and thus, forcing you to start the entire process all over again.
For easier identification you can label the wrap using a marker. An alternative would be to acquire stickers concerning the battery’s original information and putting them on the wraps. Labeling helps avoid using the cells on unsuitable devices that may harm the cells.
How do you change an 18650-battery wrap?
Before you conduct the rewrapping experience, it is always advisable to ensure that the battery isn’t fully charged. You can opt to discharge the battery in its designated device to ensure that the charge capacity is low. This is a safety precaution that allows you to prevent accidents that may cause fire hazards. For example, if you happen to puncture the battery or short it during the process, while it’s at full charge, it can release all of its energy causing spontaneous combustion. Installing a wrap around the battery can help prevent such incidences.
Step 1. Take off the old wrap
When you’re removing the old wrap it is advisable to cut down on the negative terminal. This is because if you were to cut down on the positive one, you might short the cells and damage the battery. If the old wrap was damaged you can decide to peel it off the body using your fingers. When using a sharp object such as a knife to scrap off the wrap, do it gently to avoid damaging the outer casing or puncturing the cell.
Normally these cells tend to have a protection circuit leaving a flat ring at the end-side of the battery. Don’t touch the ring using a metal object or dent it once the insulation wrap is removed because doing that can short the battery. You are only allowed to take it out if it seems damaged or if it may be loose. The paper rings are used to protect the battery form shorting on both terminals and therefore, you should ensure that you don’t lose them.
Step 2. Rewrapping
Place the paper rings on top of the cell and wrap the battery. Use the cut wrap to enclose the body of the cell entirely. Once the wrap is on, and aligned appropriately, you can then use the heat gun or blow drier to apply heat. Carefully apply the heat from top to bottom of the battery and also rotate it as you do this. A few seconds of heat should be enough to heat shrink the wrap in place but too much heat can melt it.
Once you’re done, you can label the cells with a marker or put some stickers on it with the actual manufacturer information.
Conclusion
Wrapping your 18650 batteries is a good measure for protecting the cells from injuries or damages. It is therefore advisable to ensure that your battery is well wrapped before using it because since the body itself is a negative terminal, damaging it with metal objects can short out the cell. This guide can be used on different battery sizes to ensure that the wrapping process is safe and done efficiently.
- Prev Article: Lithium Battery Jumper Reviews-Introduction and Choice
- Next Article: Lithium Battery Fireproof Bag-Function Analysis
Leave Message
Hottest Categories
-
Hottest Industry News
-
Latest Industry News


