DIY 18650 Battery Holder Case Box-Definition and Working
APR 08, 2020 Pageview:2658
Due to the need for more power and more time on a single charge, it is at times necessary to connect more than one battery to increase the overall battery capacity. This is achieved by connecting several batteries in series or parallel using a battery connector or battery holders.
What is a 18650 battery holder case box?
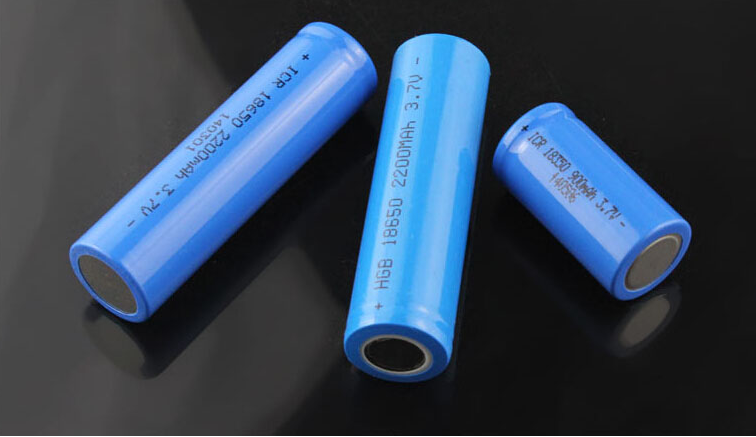
A holder case box refers to an enclosure that is used to connect two or more batteries to generate more power and also have a higher capacity. A battery holder cases are what has made it possible to have batteries for devices that have over 7000mah capacity. These batteries house several 18650 cells that when combined form batteries with big capacities and output power.
Battery holder cases do not have complex technology in them. Most of the common ones around are just designed with grooves that are a size of the 18650 batteries with terminals that are interconnected using wires. This means cells of a different size will not be able to fit into a battery holder for the 18650 batteries. So, while buying a battery holder case box, you need to be careful of the size of the holder you're buying to avoid buying an over-sized or under-sized one.
How does 18650 battery holder case box work?
A holder case box like we defined above is a compartment that houses two or more batteries to generate more power. The battery holder can have the battery cells connected in either series or parallel. Connecting the batteries in parallel sums all the current produced by each battery but the overall voltage produced is equal to the voltage of each cell. For instance, if each 18650 cell has 3.7v and a current of 10A. Connecting 3 cells of these capacities in parallel would lead to an output of 3.7V and 30A.
On the other hand, connecting batteries in series will sum up to the voltage to the desired amount you need. So basically, if you aim to have an overall higher voltage, you will have to connect the battery cells in series to achieve this. If the same 3 cells we used above are connected in series, the overall voltage and current produced will be 11.1v and 10A respectively.
A battery holder is what aids these kinds of connections. All you will have to do is to place the batteries into the holder depending on the number of slots the holder has. And this will give you an overall greater power at the end of the day. This same concept is what is used while making Laptop batteries. Laptop batteries are mostly connected in series because Laptops need a voltage more than the 3.7V( the standard for 18650 batteries).
If you choose to buy a battery holder, make sure you choose one that meets your desired goal. Your battery holder sellers will always tell you whether the battery holder is designed for parallel connections or series connections. But you can also easily see this if you carefully look at the holder terminals. With a series connection, all the negative terminals are on one side and the positives are on the other side. Then a wire interconnects all terminals to produce an overall voltage that is a sum of the voltage for all the cells. With parallel connection, the positive and negative terminals are interchanged for every cell.
How do you DIY 18650 battery holder case box?
18650 batteries do not have sophisticated technology and do not require a lot of technical knowledge to make yourself one. Doing it yourself (DIY) is the way to go if you don't want to spend money buying a battery holder case. Another advantage of making the battery holder case yourself is it gives you the freedom to do a design that meets your requirements.
Here are the steps to make 18650 battery holder case box
1.Determine the number of cells you will have to connect. This can be got from the input power of your target device. Use the device input voltage and current to determine the number of cells you will need. This input should also help you determine whether you need to connect the batteries in series or parallel or a combination of the two.
2.The next step is having all the materials and tools needed to make the battery holder in place. The materials and tools include the following; a ruler, hard paper/cardboard/plastic, glue, wires, springs to hold the negative terminals of the batteries and any small piece of copper or steel for holding the positive terminal. The choice of materials should entirely depend on what is available at your disposal as long as it can get the job done
3.Cut a reasonable size of the hard paper that will be used as the base of the battery holder. Make sure this base is slightly longer than the length of the battery to leave an allowance for the terminal holders. Cut two other pieces of the hard paper that will be used as the sides of the battery holder box
4.Measure the length of the battery and mark this same length on the battery base. Make sure you leave a small allowance for the negative and positive terminal spring and metal pieces. Measure and mark out the points where you are going to place the negative and positive terminals on the hard paper pieces that you're going to use as the sides of the box.
5.The next step is to glue the side pieces of the hard paper onto the base. Then glue the spring for the negative terminal onto the side hard paper piece. Then also glue the other metal piece for the positive terminal onto the side hard paper piece.
6.Use the two wires to connect the negative terminals on one side and the positive terminals on the other side. These are the two wires that will be connected to the device to power it up
7.At this point, the holder case box is ready for use. But before using it make sure the glue has dried properly to avoid any chances of the parts falling off from one another
After connecting the batteries, you can then connect the device you intend to power up. If the devices don’t work then there are chances that the connections are not proper or any of your terminals or wires is not conducting electricity. Check this or even change materials if the problem persists
- Prev Article: Best Way to Dispose of Lithium Batteries –Environmentally Friendly
- Next Article: Built in Li-ion Battery –Construction and Working
Leave Message
Hottest Categories
-
Hottest Industry News
-
Latest Industry News


