You Should Know More About DIY Lithium-Ion Battery
Jul 23, 2019 Pageview:1322
Lithium-ion batteries are gaining huge popularity these days and you can find these rechargeable batteries in laptops, cell phones, PDAs and iPods. Their popularity is all because of their high energy density, low self-discharge, and no memory effect. If you’re looking for a DIY guide to build your own lithium-ion battery packs, then you will be glad to know that you’ve come to the right place.
You can build your own lithium-ion battery to use it for radio, cell phone charger, headlight, etc. Here is a complete guide on DIY lithium batteries you’re looking for.
DIY lithium batteries: How to Build Your Own Battery Packs
If you don’t want or can’t afford to purchase lithium battery, then the good news is that you can build your own battery pack. Even though DIY lithium batteries take lots of soldering, you don’t need to be super-skilled. So, let’s begin to learn -
Step 1: PCB
Well, if the batteries are the core of the lithium-ion battery, then the PCB is also the brain. So, consider PCB as it soldering wires on it is quite easy and its role is stopping solder from falling onto the rest of the board. One thing to note that there are different varieties of PCBs and it depends on capacity, voltage, etc. You should check which PCBs you can use with cell-like 18650s on battery space.
Step 2: Cells
The term cells and batteries are quite used interchangeably. But, there is the difference and it is that a battery can be designed of many cells and the cell is the important element of the battery that stores power. Let’s take an example - you can make a battery of 16 cells with 4SAP as configuration. This configuration means that 4 series along with 4 parallel.
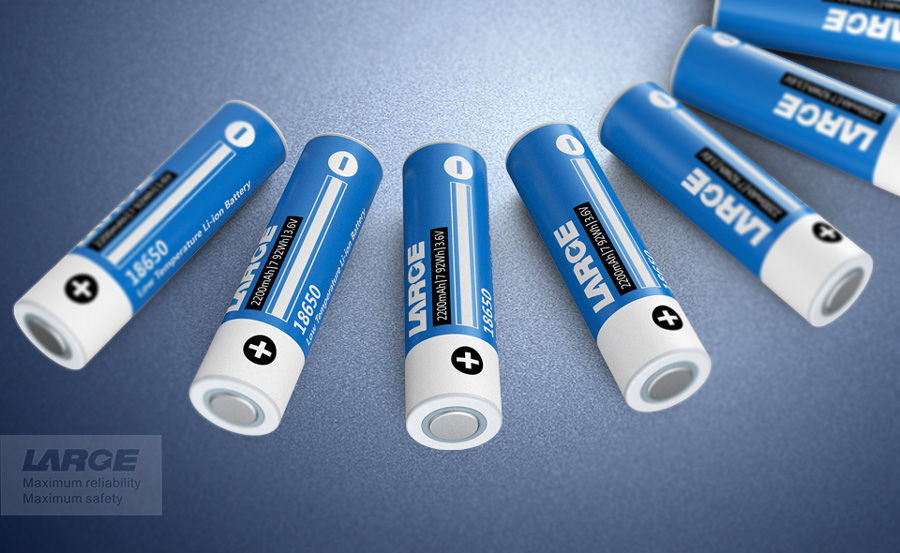
The cells are quite a common format and that’s why they are widely available on the market, called 18650s as they are 18mmX65mm.
Step 3: Battery Holders
Battery holders are a quite better choice as you can easily remove cells if they die. You can purchase battery holders online and you need only four of them.
Your DIY task is soldering the connections in the back together so that all the +ve (positives) gets connect to the other +ve (positives) and do this same process with the -ve (negatives). Finally, you’ll have 2 wires coming out, one negative and one positive.
There will be four cells in this battery holder, but it will serve as one cell at once when it is connected to PCB. For this DIY project, consider 1S4P configuration.
Step 4: Project Box
You need something that can help you to keep batteries stand still. Remember that wires can also tremble out of the terminal blocks and thus, tightly screw them just for serviceability. You can us some bolts and nuts for connecting the terminal blocks to your project box. You can consider any size that will completely fit all over the terminal blocks.
Also, place thin plastic or some type of insulation between batteries layers.
Step 5: Wire the PCB and balance leads
The recommended way for wiring is European Style terminal blocks. In order to charge the battery, you should find 4S JXT type plugs.
Step 6: Balance charging
There are two approaches to charge the battery. One is to apply 4.2 volts to each cell or apply 16.8 volts to the entire battery.
Step 7: Activate the PCB
Once everything wired properly and correctly, it’s time to activate the PCB. If the PCB doesn’t work for you, then you can apply 16.8 volts to the P- and P+ terminals on your PCB. It is because this particular PCB is made to be charged serially, using 16.8 volts. You can use variable power support to activate the PCB.
Step 8: Charger and C rating
You surely have heard the term C rating when you begin building battery packs. Well, C here refers to the capacity of the battery. It is recommended that you should don’t charge the battery above 1C. Otherwise, your battery could catch on fire.
Step 9: Balance the pack
Keep in mind that balance the pack doesn’t mean balance charging and it is something else. Now, you will have one cell that has a higher capacity as compared to other cells. They will drop voltage at numerous different rates.
If there is the quite a large voltage difference between the highest and lowest voltage cell, then you need to take 2 cells from the highest one and then, swap them with 2 cells of the lowest one.
Step 10: Safety
Go for more insulation between layers of batteries if your battery shorts. You just need to be careful and only consider the DIY project if you have a really good idea of what you’re doing and completely understand the risk.
We hope that the above steps help you provide a little bit idea of how you can build your own battery packs at home. Also, if you buy the DIY lithium batteries building kit, then you will find mentioned the complete guide on how to build on the kit.
Is It Easy To DIY Lithium-Ion Battery?
Well, it is easy or not to build your own lithium-ion battery depends on how much knowledge you have and whether you are good at soldering and wiring. If you don’t have any experience and knowledge about building own battery packs, then it isn’t an easy job for you. Plus, you should instead prefer purchasing the battery rather than creating own.
But, if you’re good at soldering and have built previously, then the DIY lithium battery task is a little bit easy for you. All you need is the right guidance on how to make it.
Is It Dangerous To DIY Lithium-Ion Battery?
When it comes to building own lithium-ion battery packs, you need to be very cautious. If the battery shots, then it will most probably heat up along with it smell just like fried electronics. In worst case situations, it could catch fire. So, it is dangerous to the DIY lithium battery pack when you don’t know what you’re doing.
There is a popular phrase “half-knowledge is dangerous” and it completely implies on this DIY project. Thus, make sure that you know or have some knowledge about the DIY battery pack before you begin. You should buy a battery instead of building own if you’re not sure.
- Prev Article: Discussion on Lithium Coin Cell Battery
- Next Article: What do you know about lithium battery poisoning symptoms?
Leave Message
Hottest Categories
-
Hottest Industry News
-
Latest Industry News


