How to Build a Lifepo4 Battery Pack: Methods and Comparison
Jun 16, 2020 Pageview:3020
Electronic device enthusiasts must have heard of Lifepo4. Who hasn’t? After all, it is one of the unique batteries out there that has powerful energy used for some of the unexpected things such as golf caddies and kayaks. Unfortunately, the price is something we should underestimate. For those who want to have their own lifepo4 batteries, don’t worry! We will teach you how to build a lifepo4 battery pack by yourself. While you save up for the more professional lifepo4, you can opt for the homemade one. It’s cheaper too!
How do you build a lifepo4 battery pack?
Building your own lifepo4 battery pack is no easy matter, but it’s not as complicated as it sounds either. Here are the materials you need. You assemble them according to the materials listed:
The Cells
First, you should not that LifePo4 is not the same as other LiPo cells. They are similar but not quite the same in terms of several compounds and usage, so the voltage and other compounds might not be the same.
For LifePo4, you will need at least four cells (4S) for a pack of 12.8 volts. The size of the cell, however, is a whole different matter. It would be best if you determined the focus of the battery. Will it listen more or transmit more? You should also note how long you want the battery to stand by itself without being recharged.
BMS
BMS is the center of the battery. It helps the battery from being “over” in everything, from overcharged to over-discharged. There’s no need for the BMS to be expensive, as long as it can protect the batteries from overcharging, overcurrent, and over-discharge.
LVD
The LVD can help you keep the energy as much as possible, as it allows the device to take power in a small portion one step at a time.
DC Power Analyzer
Please don’t underestimate the analyzer, as it can help you to determine how much energy you have left. You can use solar charge, but you’ll end up needing two DC analyzers.
Cell Balance
This is optional, but it’s a suitable device for your domestic battery. It gives a balance of volt for each cell so that each one of them can have an equal amount of volt.
Pack
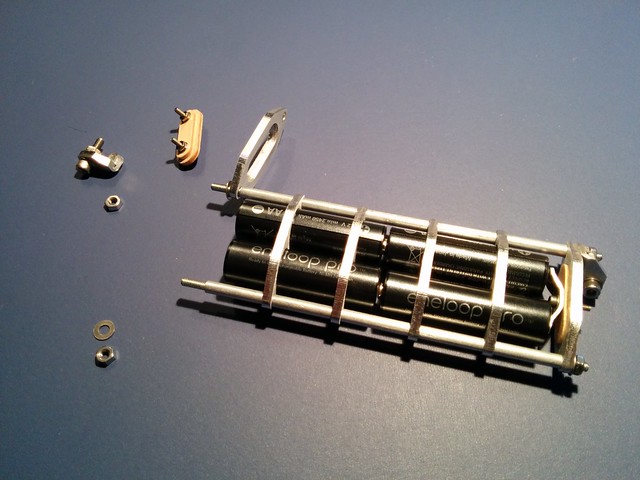
The pack is used to hold the cells. Since we use four batteries, buy the one that has four slots for the cells. If not, buy two packs separately. When you place them, make sure that the opposites are next to each other. For example, when the top is positive, set the opposite charge (which is negative) next to the positive.
After the batteries are assembled and placed into the pack, wrap them with PVC to hold everything together.
Cell Interconnects
Just like the name states, cell interconnects are used to connect the cells. It’s best to use bus bars for interconnects.
Wires and Connectors
The wires and connectors are used to connect the cells to the chargers and loads. You would need around 26 to 28 cables and connectors to connect everything properly.
There are different kinds of connectors, so you should pick the ones with good insulators. They might be pricey sometimes, but it’s better than having faulty connectors. You will also need to check the volt, as the number of volts also determines the size of the wires and connectors. So, make sure you check everything thoroughly before connecting them to the cells.
Once you’ve assembled your batteries, check the weight and the capacity of the battery. It would be best if you also made sure that the charger you’ve prepared suit the cell.
If you’re still unclear about assembling it, you can check out this video.
Is the lifepo4 battery pack the same as a lithium-ion battery pack?
Although the two are in the same categories, there are several differences between LifePo4 and lithium-ion batteries.
The first difference is the consistency of the voltage. The two of the batteries might start with the same amount of consistent, but lithium-ion’s energy tends to go down like a slope. Meanwhile, LifePO4’s voltages remain steady and only go down at its last moments. Due to its consistency, LifePo4 batteries are commonly used for things that need constant energy such as boats, golf caddies, boats, e-bikes, and other vehicles. In fact, it is also used as energy storage!
There are also differences in components. LifePO4’s cell density is smaller than that of lithium-ion, so it is safer to use (less density gives less volatility).
The age of the two batteries also differs. Lithium-ion can be used for 500 charge cycles at most, and the minimum is 300 charge cycles. Meanwhile, LifePO4 cycle charge can be up to 2000. So if it’s used at its maximum, LifePO4 can be used for ten years, unlike lithium-ion’s 2-year age.
That does not mean that lithium-ion has fewer capacities than LifePO4, of course. In fact, you can stack lithium-ion in parallel so that the capacity can be increased. As for LifePO4’s capacity, it’s pretty big too. It’s around lead-acid batteries multiplied by 4.
How many lifepo4 battery cells do you need to build a lifepo4 battery pack?
If you want to make a constant LifePO4 battery pack, it’s best to use four batteries. You need to make sure that they’re placed in parallel when you assemble them. There are many kinds of LifePO4 cells, so you can pick any batteries that suit your needs or budgets.
Don’t be discouraged by the steps (and video for some) above. They might sound complicated at first, but once you’ve tried it, everything is going to be a breeze. If you couldn’t do it on your first try, don’t give up! Remember the amount of energy they have and the age of the battery. You can save lots of money by using LifePO4, and even more so when you create one by yourself! So what are you waiting for? Make your battery now!
- Prev Article: What Is LiFePO4 Battery-Application, Comparison And Meaning
- Next Article: 18650 Battery Holder-Need, Dimensions and Usage
Leave Message
Hottest Categories
-
Hottest Industry News
-
Latest Industry News


